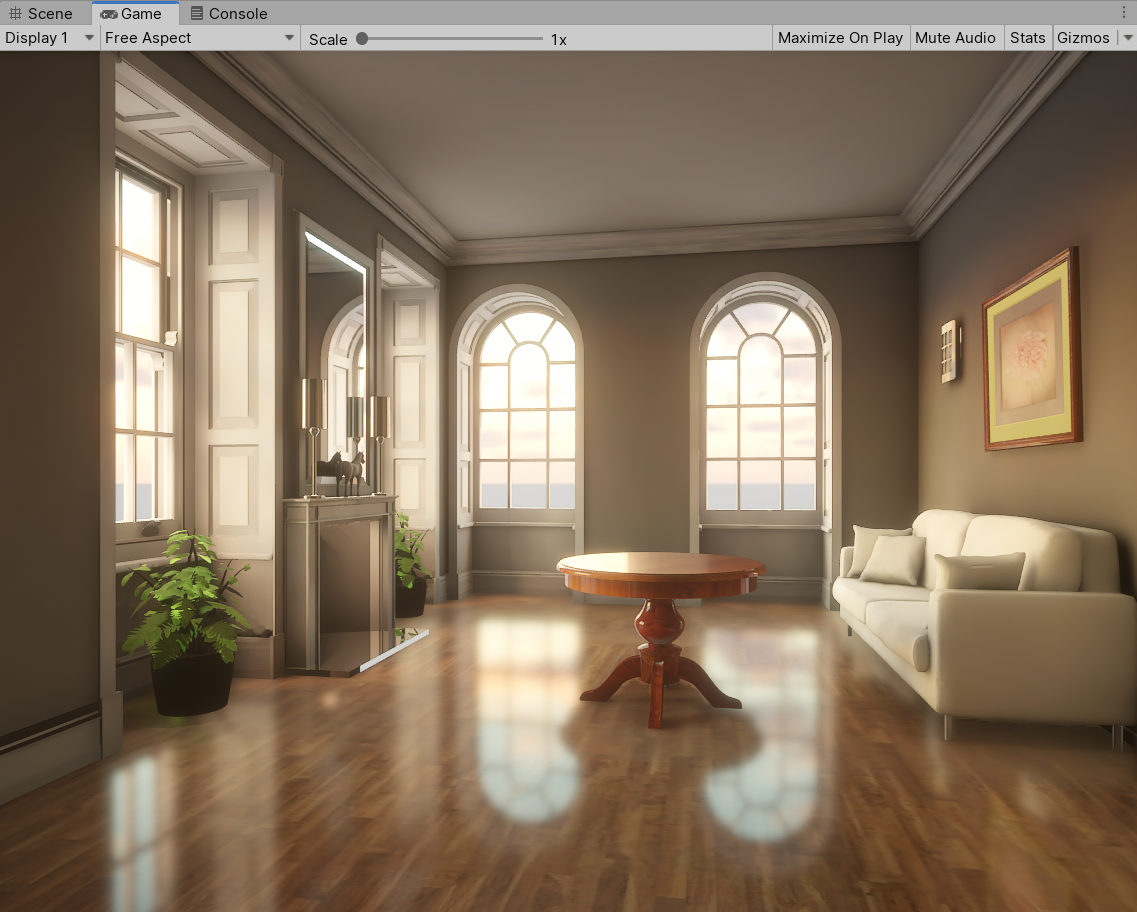
Bring the Living-Room to Unity.
 The living-room rendered in Unity
Notes
This is my final project for a virtual reality and game development course. My contribution is bringing a Benedikt Bitterli’s famous rendering scene living-room to Unity and showing how we could use various rasterization techniques to approximate the beauty image produced by offline renderer.
Forewords
Ray tracing is an elegant algorithm used in computer graphics to synthesis realistic images. It shoots tremendous rays to find intersection with geometries in the scene and shading with lights and tries its best to simulate the light transport process in nature. The algorithm is not so fast however and it is not unusual to spend hours to days rendering a single image for the complex scenes produced by artists in the movie industry.
Rasterization on the other hand, represents a way to render efficiently, which is used ubiquitously in realtime rendering. Thanks to the efforts of many graphics researchers and engineers for many years, realtime rendering could already produce some good-looking images nowadays. Consequently, in this project I’d like to find out how good it could be in a game engine.
Note that these days realtime ray tracing becomes popular due to the introduction of NVIDIA’s RTX architecture in Turing GPUs, which is able to do the ray intersection in a lightning fast way. However, it requires a decent graphics card and my old GTX-960M is a bit out-of-date. So I give up the idea and turn to Unity’s HDRP Rendering Pipeline (The High Definition Render Pipeline) for the project.
General
To generate an image as realistic as possible, we need to choose a GI (Global Illumination) system in Unity. We will miss the nice indirect lighting, reflections for example if we skip this part.
| Global Illumination Off | Global Illumination On |
|---|---|
 |
 |
Unity engine has several built-in solutions for achieving Global Illumination:
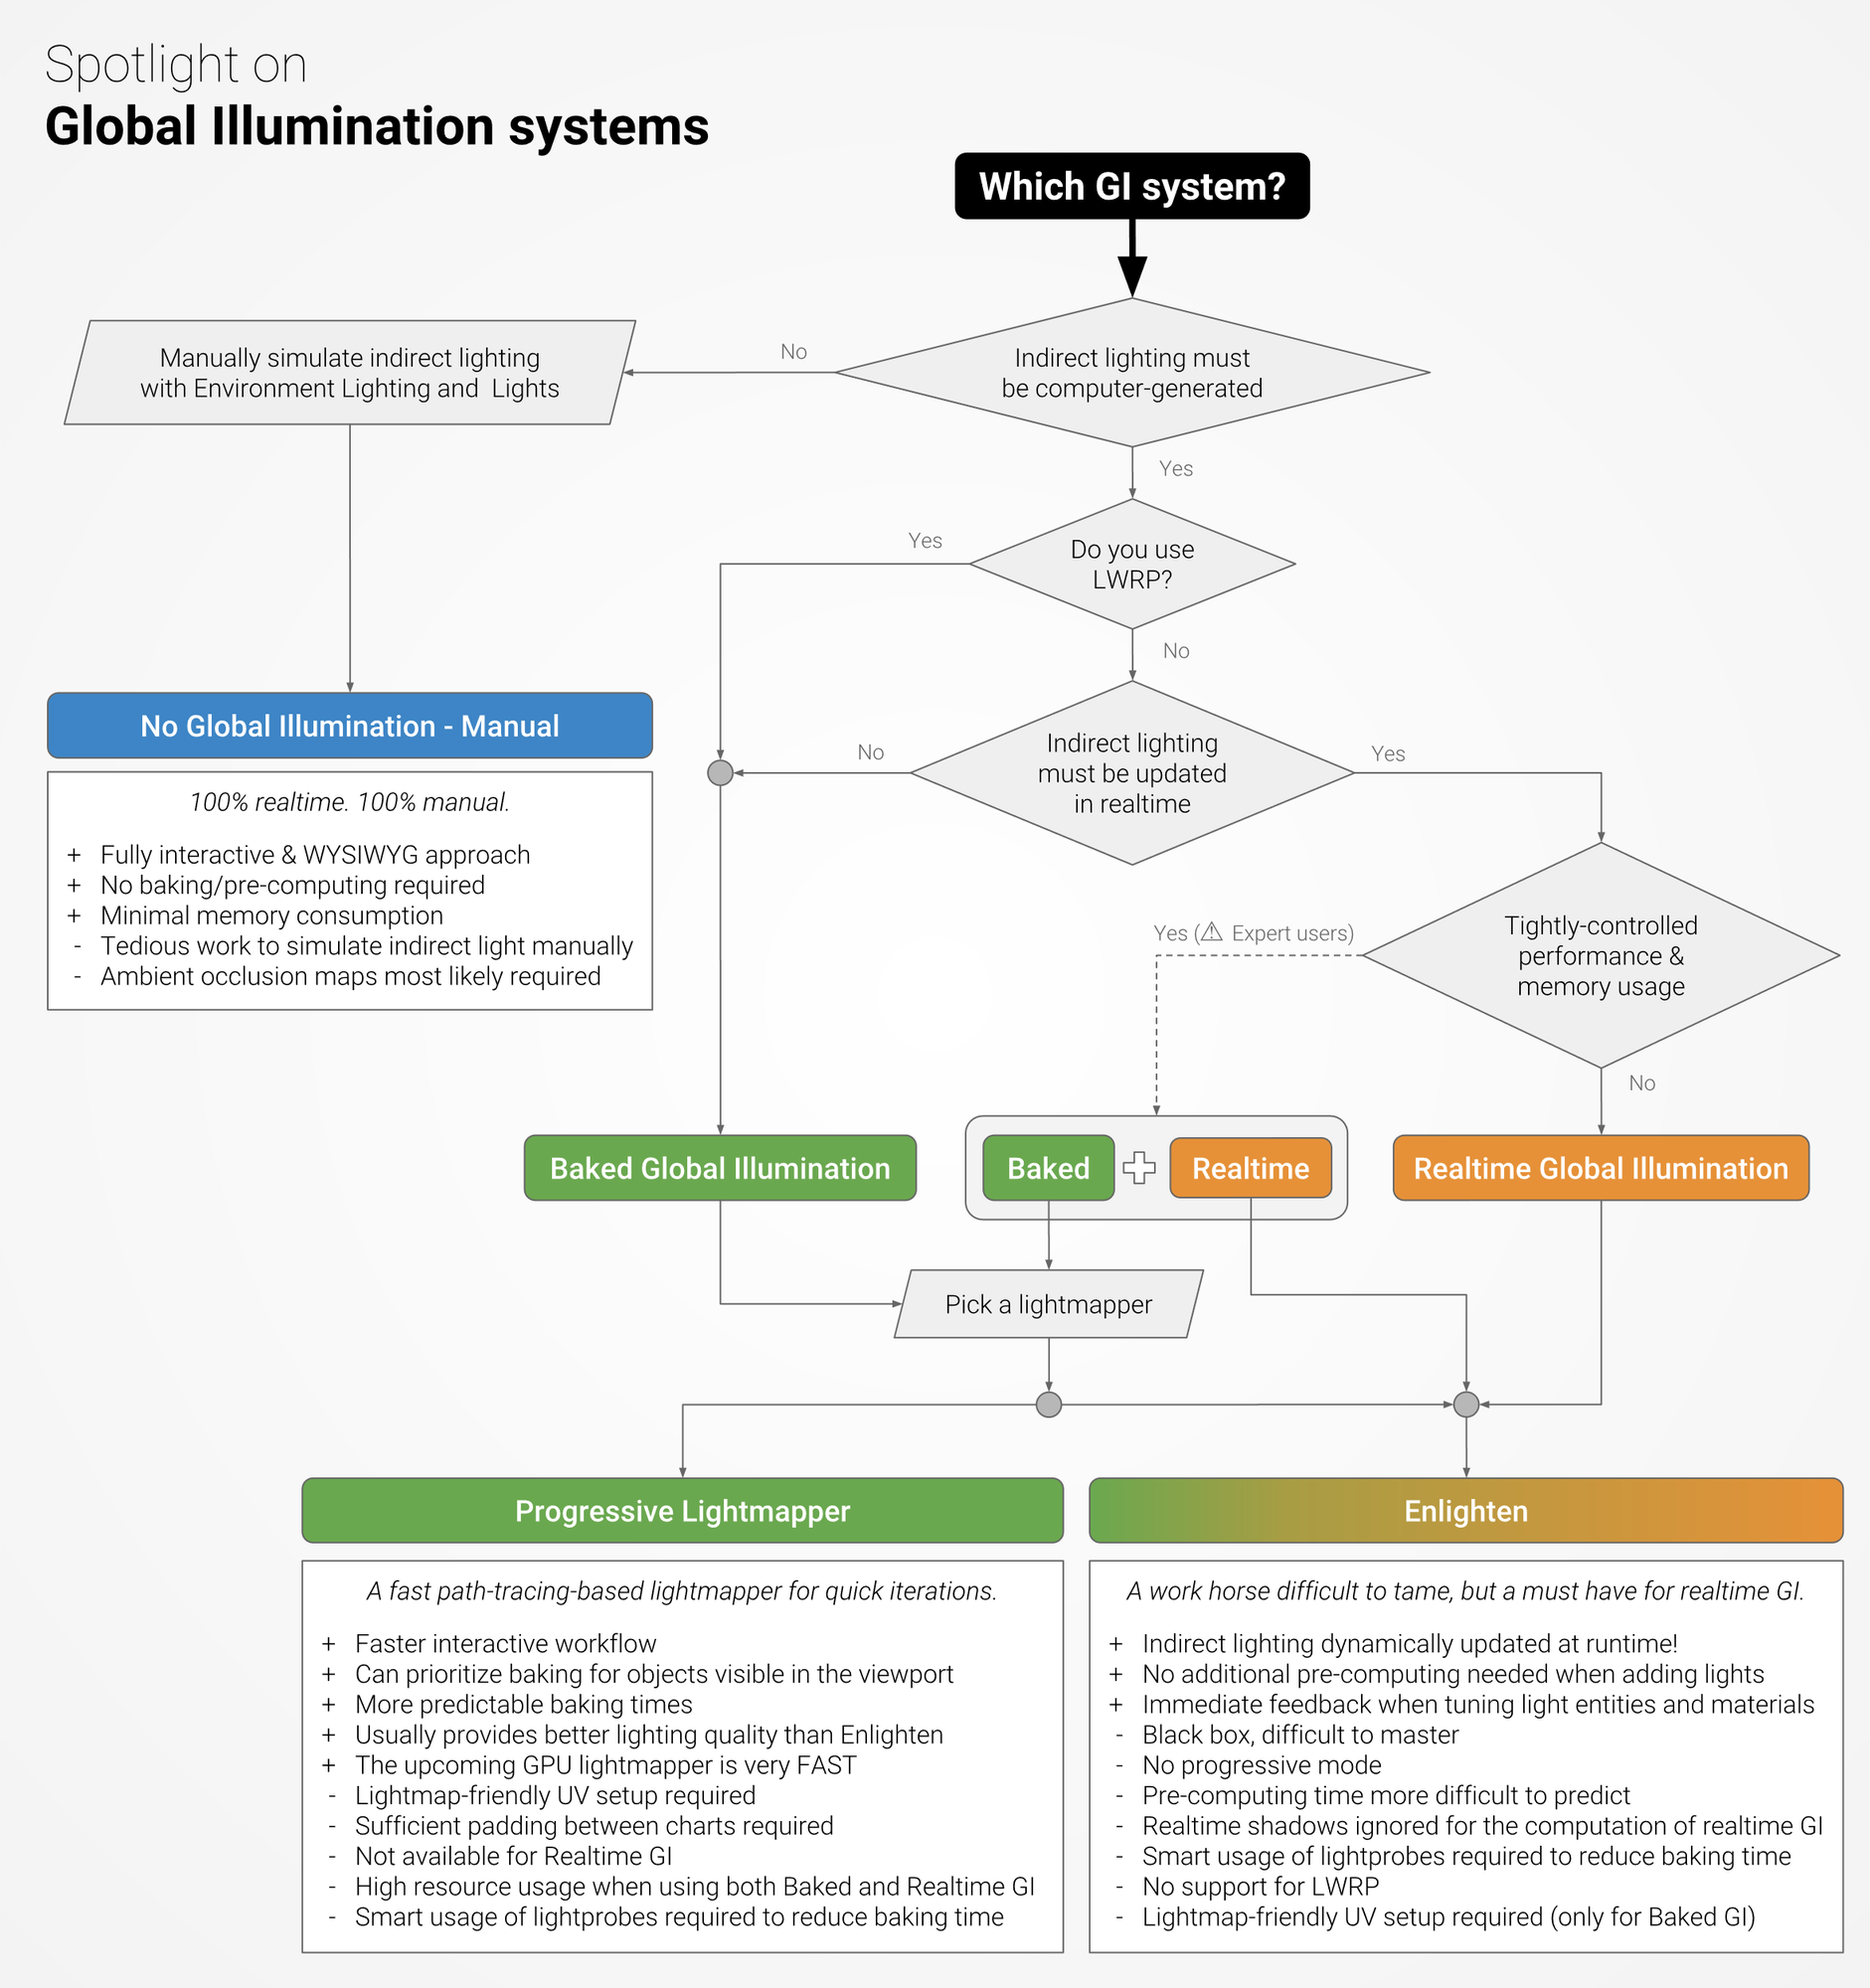
I attempted to use Enlighten in the first place and do not have a good experience since it is laborious to play with the parameters to reach my expectation. I then turned to CPU and GPU based Progressive Lightmapper for the job. Progressiveness indicates we could have a somewhat coarse preview immediately and it gradually gets refined as we wait. This is usually preferred by lots of artists since it saves time for fast iterations.
Sky and Fog Volume
To begin with, we should have a sky!
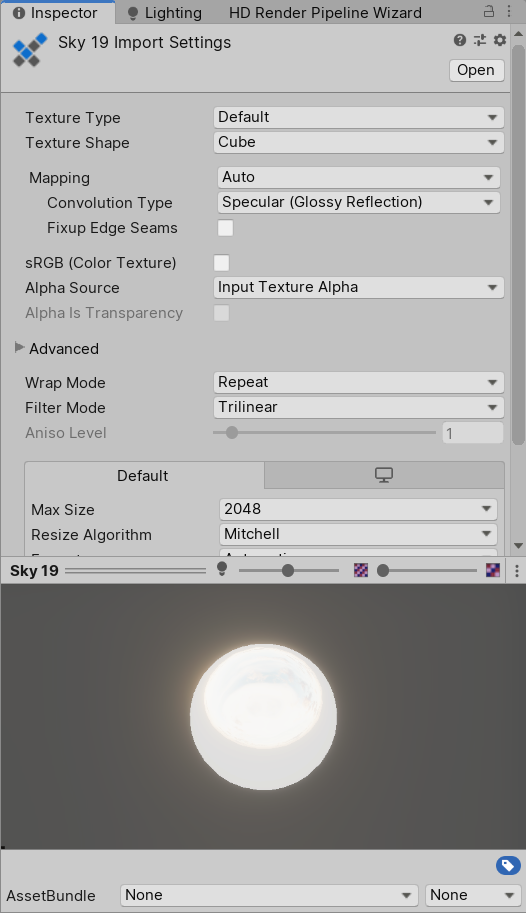
I chose to use a sky from HDRI probe, which would also be the primary luminary for our scene. We just need to import our HDRI panorama as a cubemap by setting the Texture Shape as Cube and using Trilinear Filter:
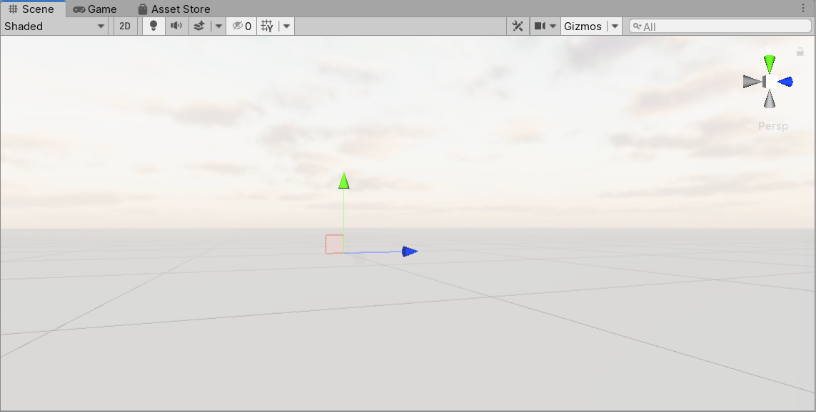
We could preview our loaded HDRI Sky in the scene as well by setting up the Volume:
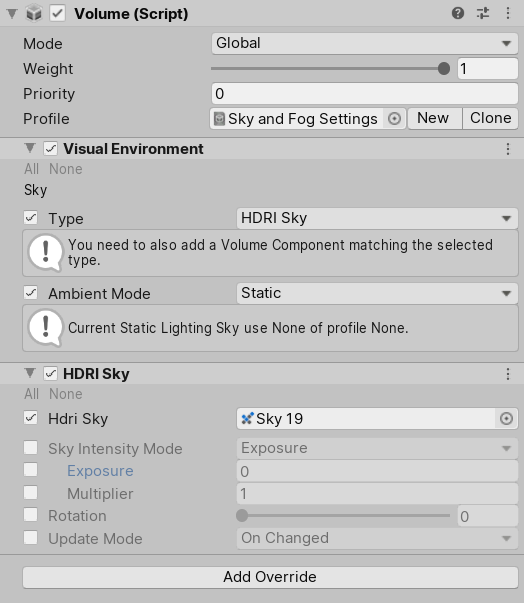
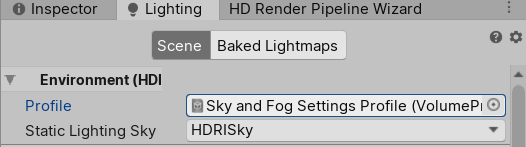
Remember we need to specify the sky in the Lighting/Environment HDR.
Cleanup the Scene
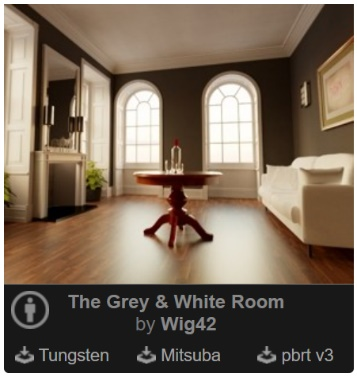
The living-room scene is from Benedikt Bitterli’s Rendering Resources:
I first import all meshes (*.obj) into Maya and group the objects by materials according to the provided scene description file (.xml). This could reduce our time for authoring and assigning materials in Unity later.
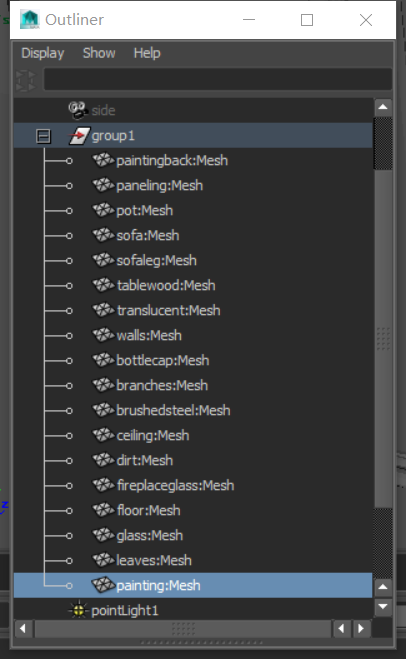
I also check the normals facing outwards and ensure the Y axis is up (the convention Unity uses):
Import the Scene
After fixing all issues in the last section, it should work well to export the scene as FBX and import in Unity.
However, there is an issue to be considered – what is our scale of the scene? This is important since we have limited precision for representing decimal in computer science. For example, the intersection point may slightly below the surface and when it shoots a shadow ray to the light to find out whether it’s blocked or not, it will be occluded by itself – a phenomenon known as shadow acne.
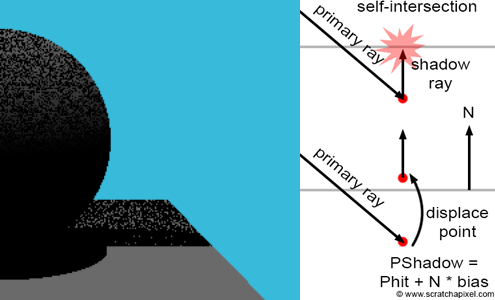
An idea is to offset the intersection point by epsilon, which should be related to the scale of the scene. If our scene lives in a small world, ‘a miss (ray epsilon in this context) is as good as a mile’! Our scale or units thus should choose consistently throughout the scene to avoid these annoying artifacts.
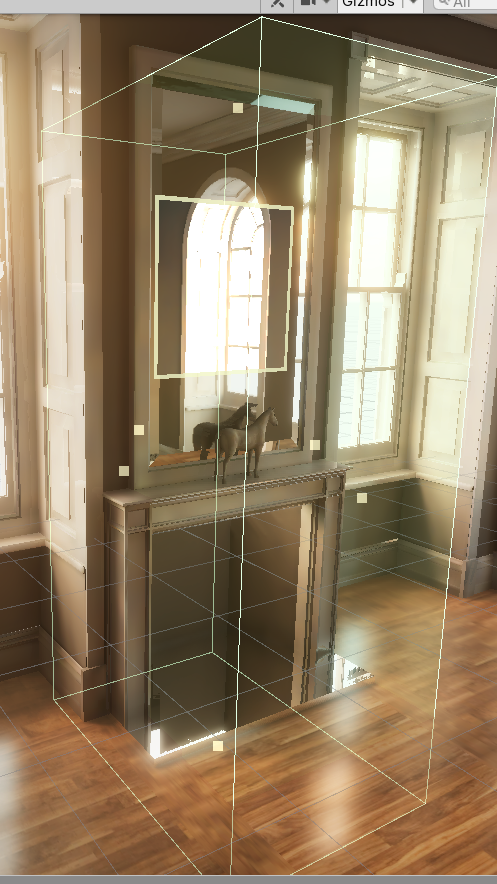
One of the simplest solutions is to compare the imported scene with the default primitive in Unity. A standard cube here has the length of 1 meter and I just scale our scene to make it match the scale – a 5m*10m*5m living room.
Testing Global Illumination
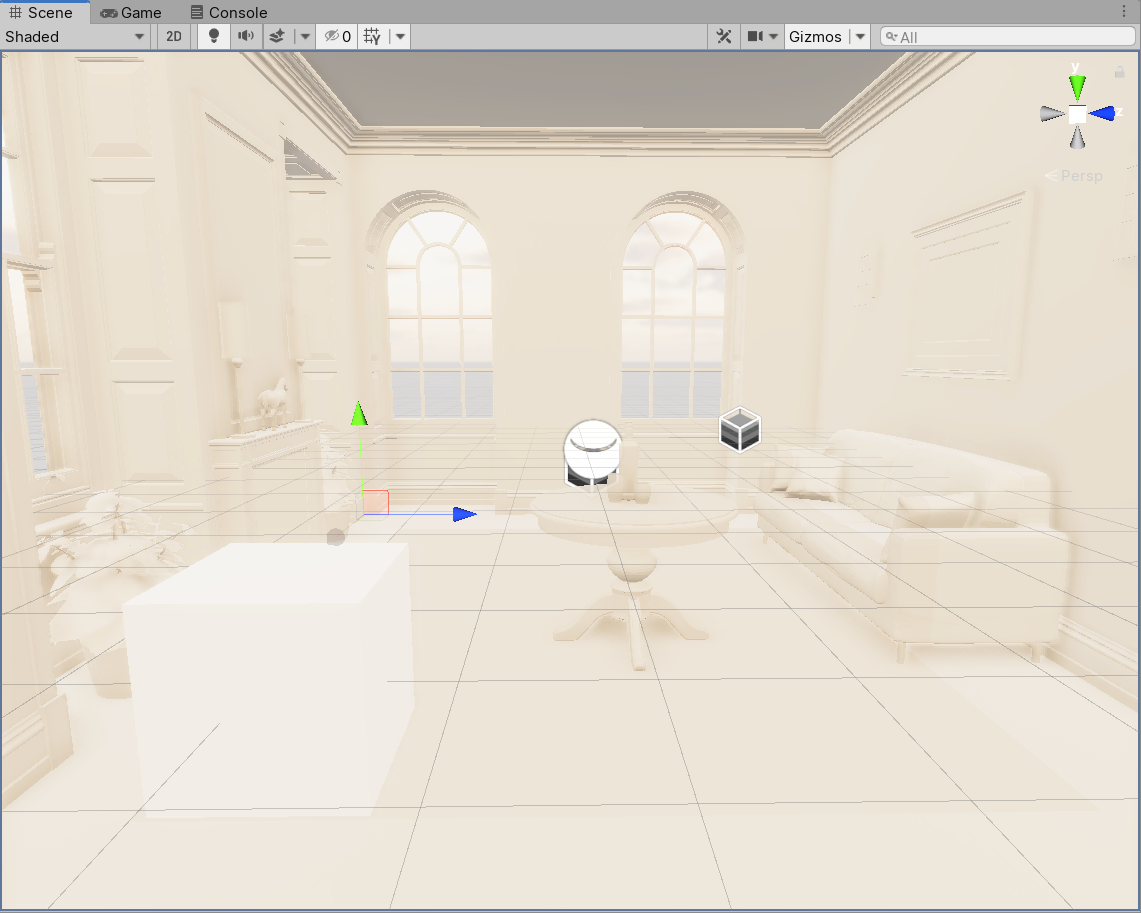
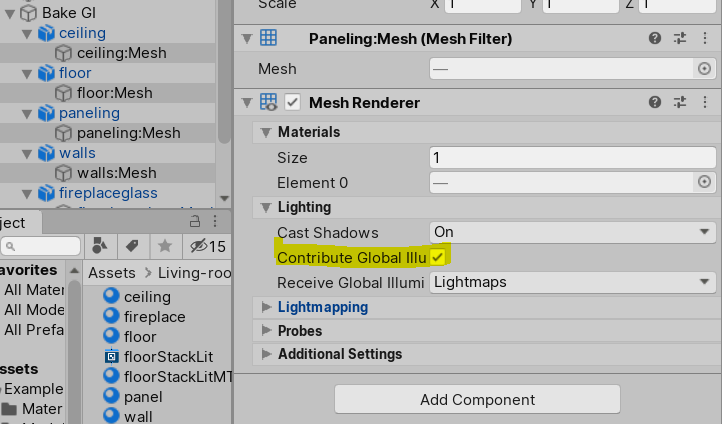
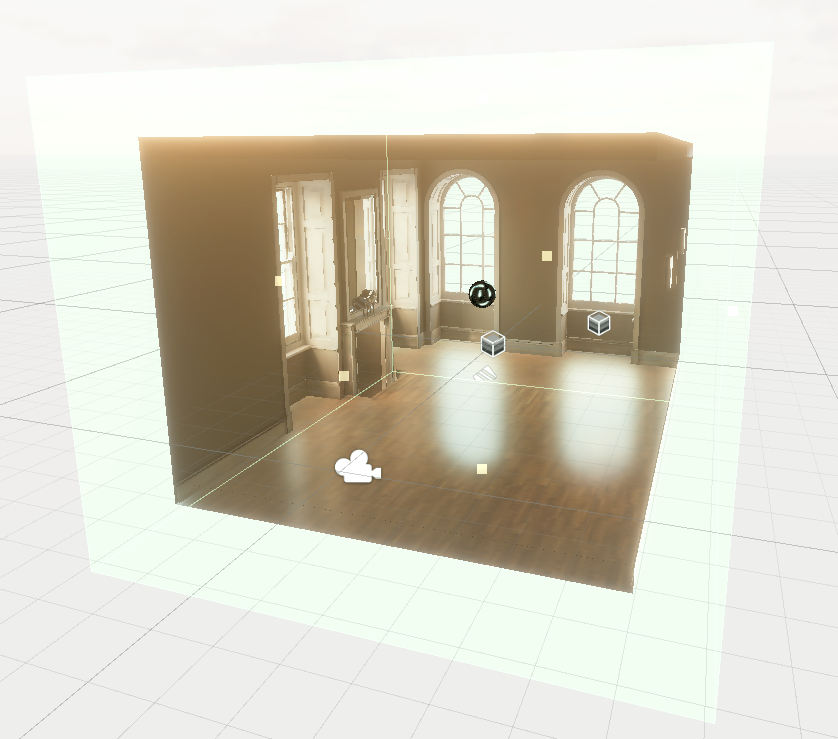
After importing the models, it is time for playing around with the global illumination system now! We could first ignore the minute props in the scene such as plants and the statue and check whether the global illumination works well for the ‘global’ environment, the look of the house. So enable the paneling, ceiling, floor, wall and the fireplace glass only and tick Contribute Global Illumination under Inspector/Mesh Renderer/Lighting.
And we could enable the baked GI solution under Lighting/Mixed Lighting and Lighting/Lightmapping Settings.
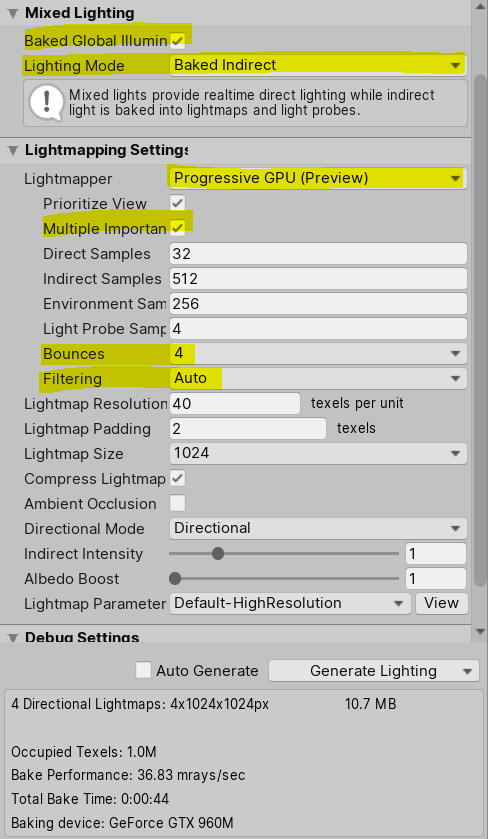
Progressive GPU lightmapper is preferred when we have enough GPU memory (at least 4GB), which is generally the way much faster than the CPU one. It requires us to have a GPU supporting OpenCL 2.2 as well.
Multiple importance sampling should always be enabled since it helps reduce variance by combining several sampling strategies. Throwing more direct and indirect samples helps reduce noises even more, but it increases the baking time as well. So we have to make a trade-off between the quality and time. But that’s not the whole story, since we could apply filtering even if we use fewer number of samples to get a decent result. By selecting the Auto setting for the Filtering, unity will do all the magic for us!
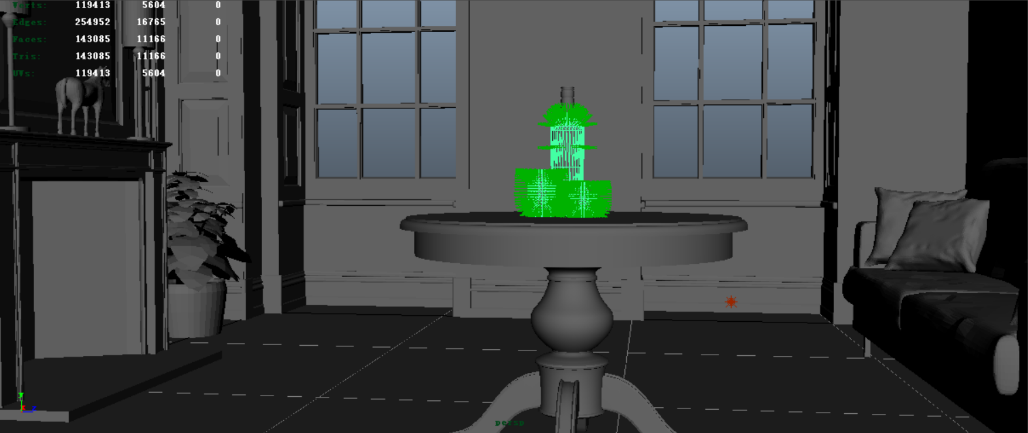
Since we are using baked GI solution, so we must have a second UV for lightmapping. This is done by Unity by enabling Generate Lightmap UVs during FBX import.

Material and Reflections
Since we have already grouped the meshes by materials, we could just assign each group of mesh with a unique material. For the ceiling and the wall, we want a Lambertian BSDF as specified in the xml file. I just use a simple HDRP/Lit shader with Metallic = 0 and Smoothness = 0.
| Material | Base Color |
|---|---|
| ceiling | R=G=B=0.578596 |
| wall | R=G=B=0.4528 |

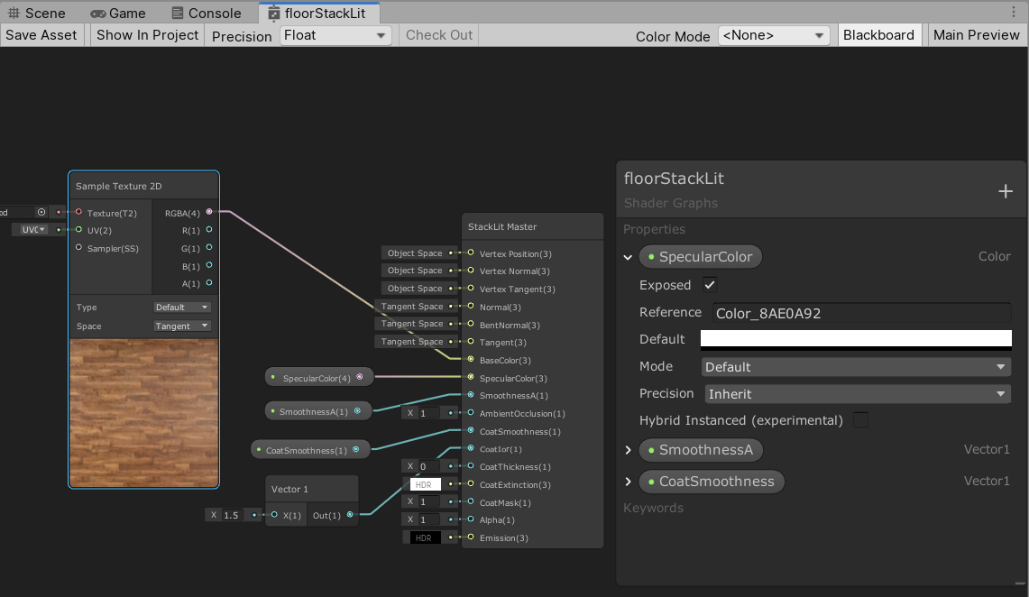
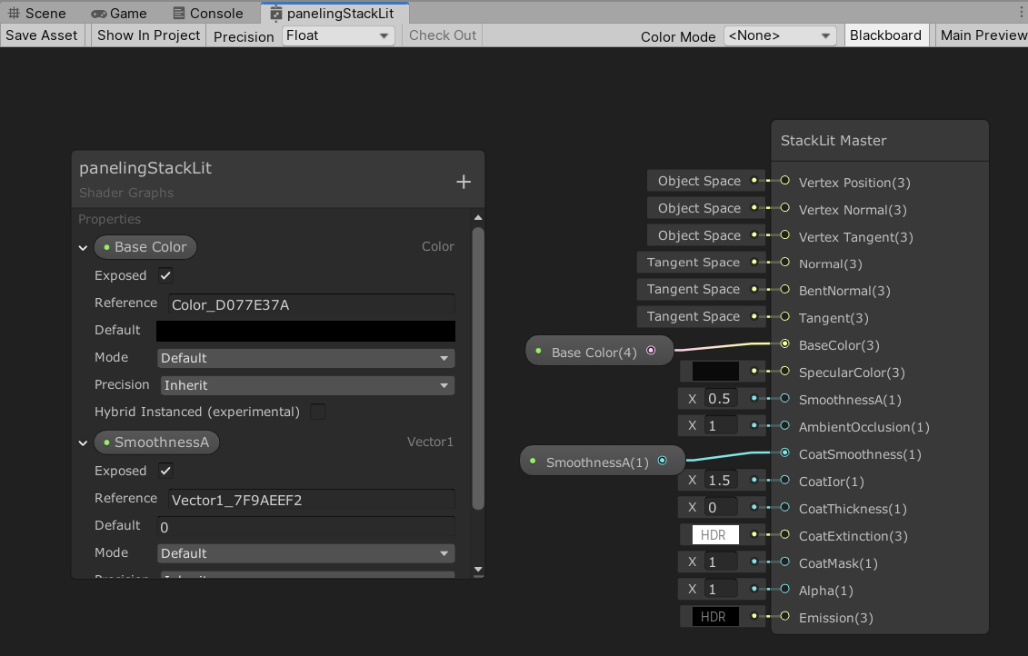
For the floor and paneling, we need to emulate the substrate BSDF or rough-coating BSDF with the underlying BSDF being Lambertian and coated with a rough dielectric BSDF with GGX distribution.
Thanks to the Laurent Belcour’s excellent work on layered material, we could easily simulate this kind of coating material in Unity using StackLit shader.
We shall use the Shader Graph to finish the task. Here is what we have for the floor:
And the paneling material:
The last material for our “global” environment is the fireplace, which is a perfectly smooth specular shader. Besides setting the Smoothness = 1 with StackLit, we need to deal with the reflection. This is one of the nasty stuff in realtime rendering – though reflection itself is a part of the global illumination, we still need to explicitly achieve the effect by using another technique – Reflection Probes. Here we create a reflection probe to capture the interior environment for the fireplace. Clicking Bake option under the Lighting, we get the nice reflection for the fireplace!
But not for the interior, oops!
It may not be so obvious, but the interior gets reflection from the exterior HDRI or Skybox instead of the interior – the floor is not missing, but reflecting the bright sky! This is due to the lack of another reflection probe for the scene.
So we could easily address this by adding another probe:
and bake!

Details and Props
It looks we are on the right track now, we could start to add more details for the scene!
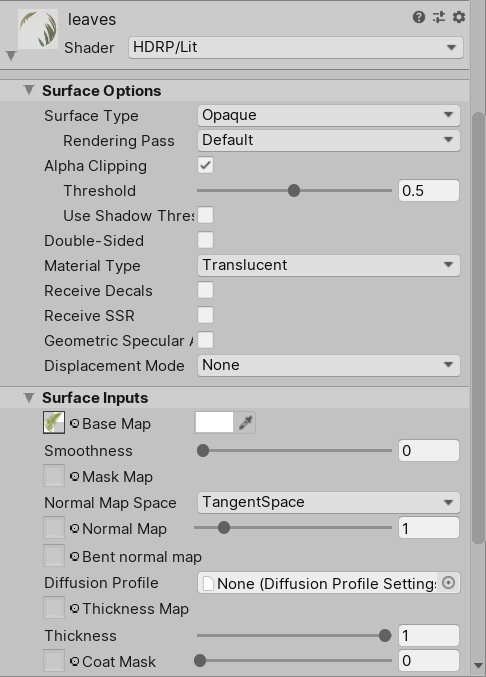
After enabling all props meshes, we begin with the brushed steel. It is like the fireplace glass, but we set the Metallic = 1 to simulate the metal. As for the painting back and the table wood, we could use the same material with the floor, with different base color textures. The sofa, painting, pot, leaves and dirt are just the Lambertians so HDRP/Lit works well.
Note that we need to use Translucent material type for the leaves and alpha cutout the geometries according to the leaves map.
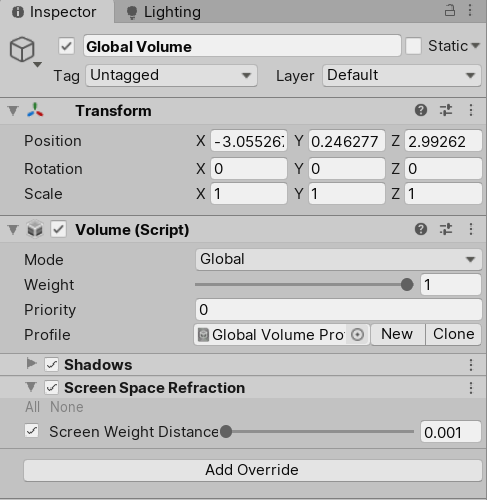
Finally, we use a transparent surface type for the glass material.
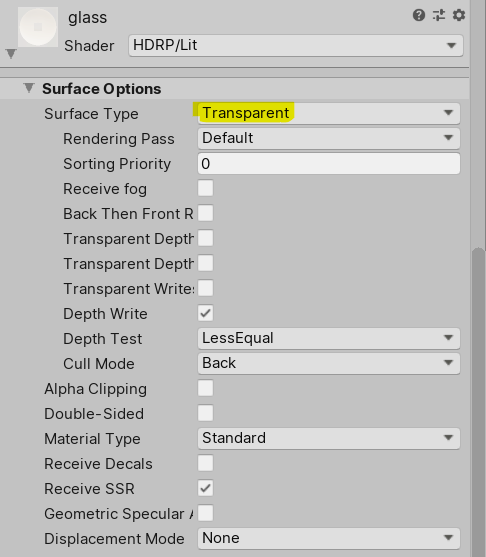
Here comes another nasty stuff in realtime rendering – refraction. Refraction is notoriously difficult to achieve in realtime rendering and is usually approximated by Screen Space Refraction:
Results and Discussions
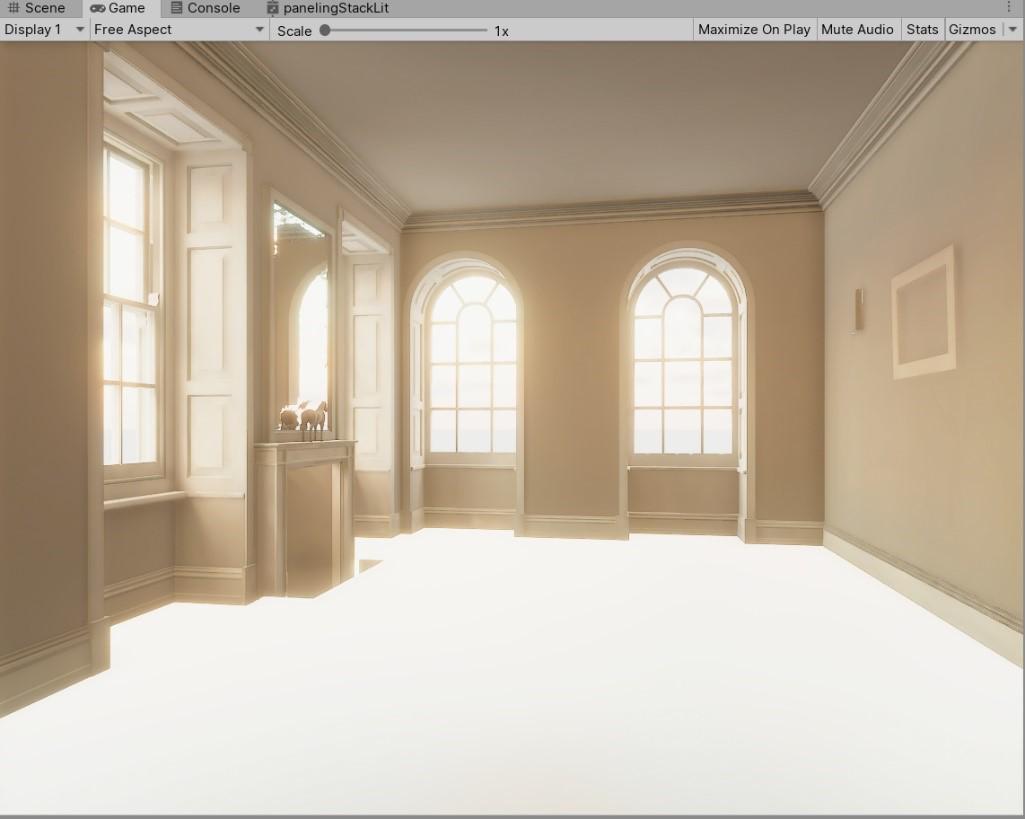
After adding up all props and setting up the materials correctly, we could simply bake our GI and here is what I get:
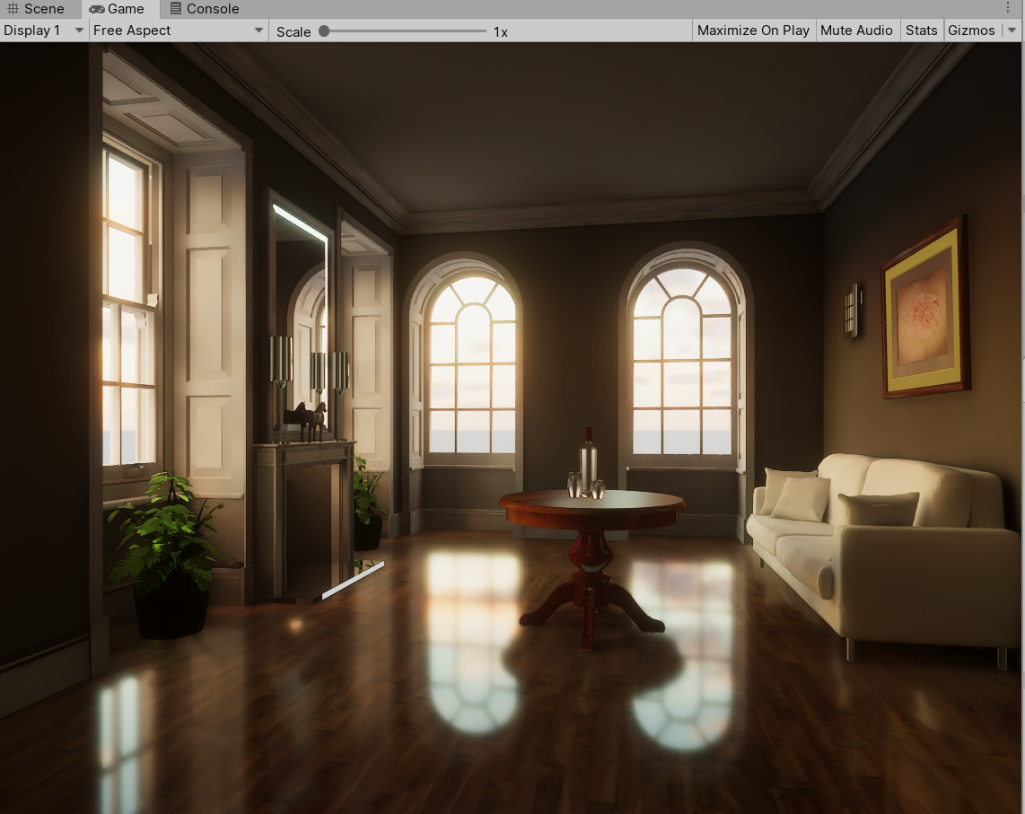
It looks kind of cool – perhaps not in a sense of realism but in a artistic style.
By comparing with the ground truth image from the ray tracing, we find that the glass seems to be weird and we lack all the nice occlusion from the objects. As for the user’s experience, I think it requires artists to pay more attention to the stuff behind rendering. For example, we have to consider the resolution or padding for the lightmap UVs, tuning the baking parameters, fixing light leaking due to the lack of reflection probes etc.
However, the image generated still looks good and the performance in realtime framerates (~80 FPS) is appealing; or we have to wait for hours to get a noise-free image using offline ray tracing!
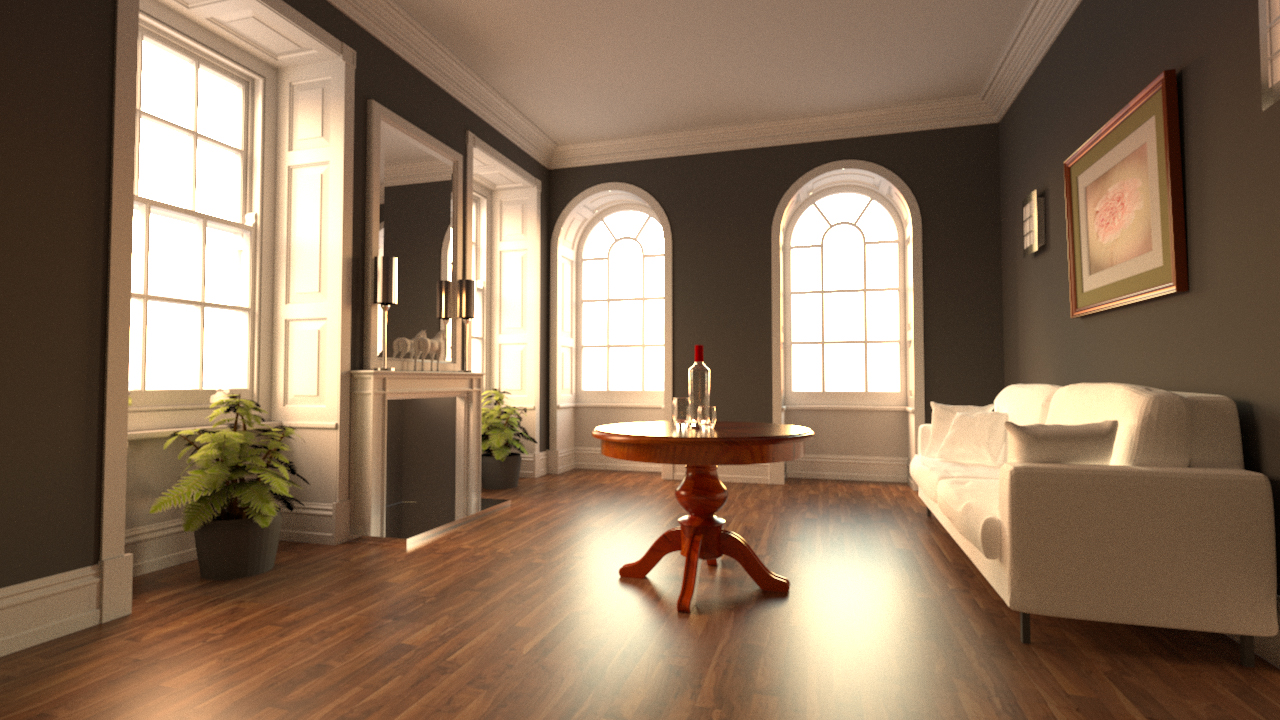
Here is another result by leveraging the post-processing pipeline: